5 Tips for Using LinkedIn Sales Navigator for Lead Generation
If you’re relatively new to LinkedIn, you may not know that LinkedIn has both free and paid versions. Building a strong and reliable Lead Generation strategy isn’t dependent on the type of LinkedIn account you have, you can absolutely get the job done with the free version of LinkedIn. If you’ve used the free version for a while and want to tap into a new network of leads, you may want to consider giving LinkedIn Sales Navigator a try. And we’ve got 5 tips for using LinkedIn Sales Navigator.

LinkedIn Sales Navigator is available to LinkedIn users via a premium subscription (the paid version of LinkedIn). This additional tool allows you to broaden your search for leads on LinkedIn and optimize your pipeline. Put simply, Sales Navigator’s purpose is to lead you to your ideal client and streamline your communication to ultimately lead you to more sales.
So, how can you get the most out of this tool to boost your lead generation process & strategy? Check out these 5 helpful hints on how to use LinkedIn Sales Navigator to grow your network and simplify your pipeline.
5 Tips for Using LinkedIn Sales Navigator
Take Advantage of Enhanced Search Features
On both the free and paid versions of LinkedIn, you can conduct people searches. These searches can be honed in using a variety of filters; however, the free LinkedIn search filters are extremely limited. The main filters for a free search include
- Filter by connection (2nd, 3rd degree connections)
- Location
- Current/Past Company
- School
- Industry
- Services
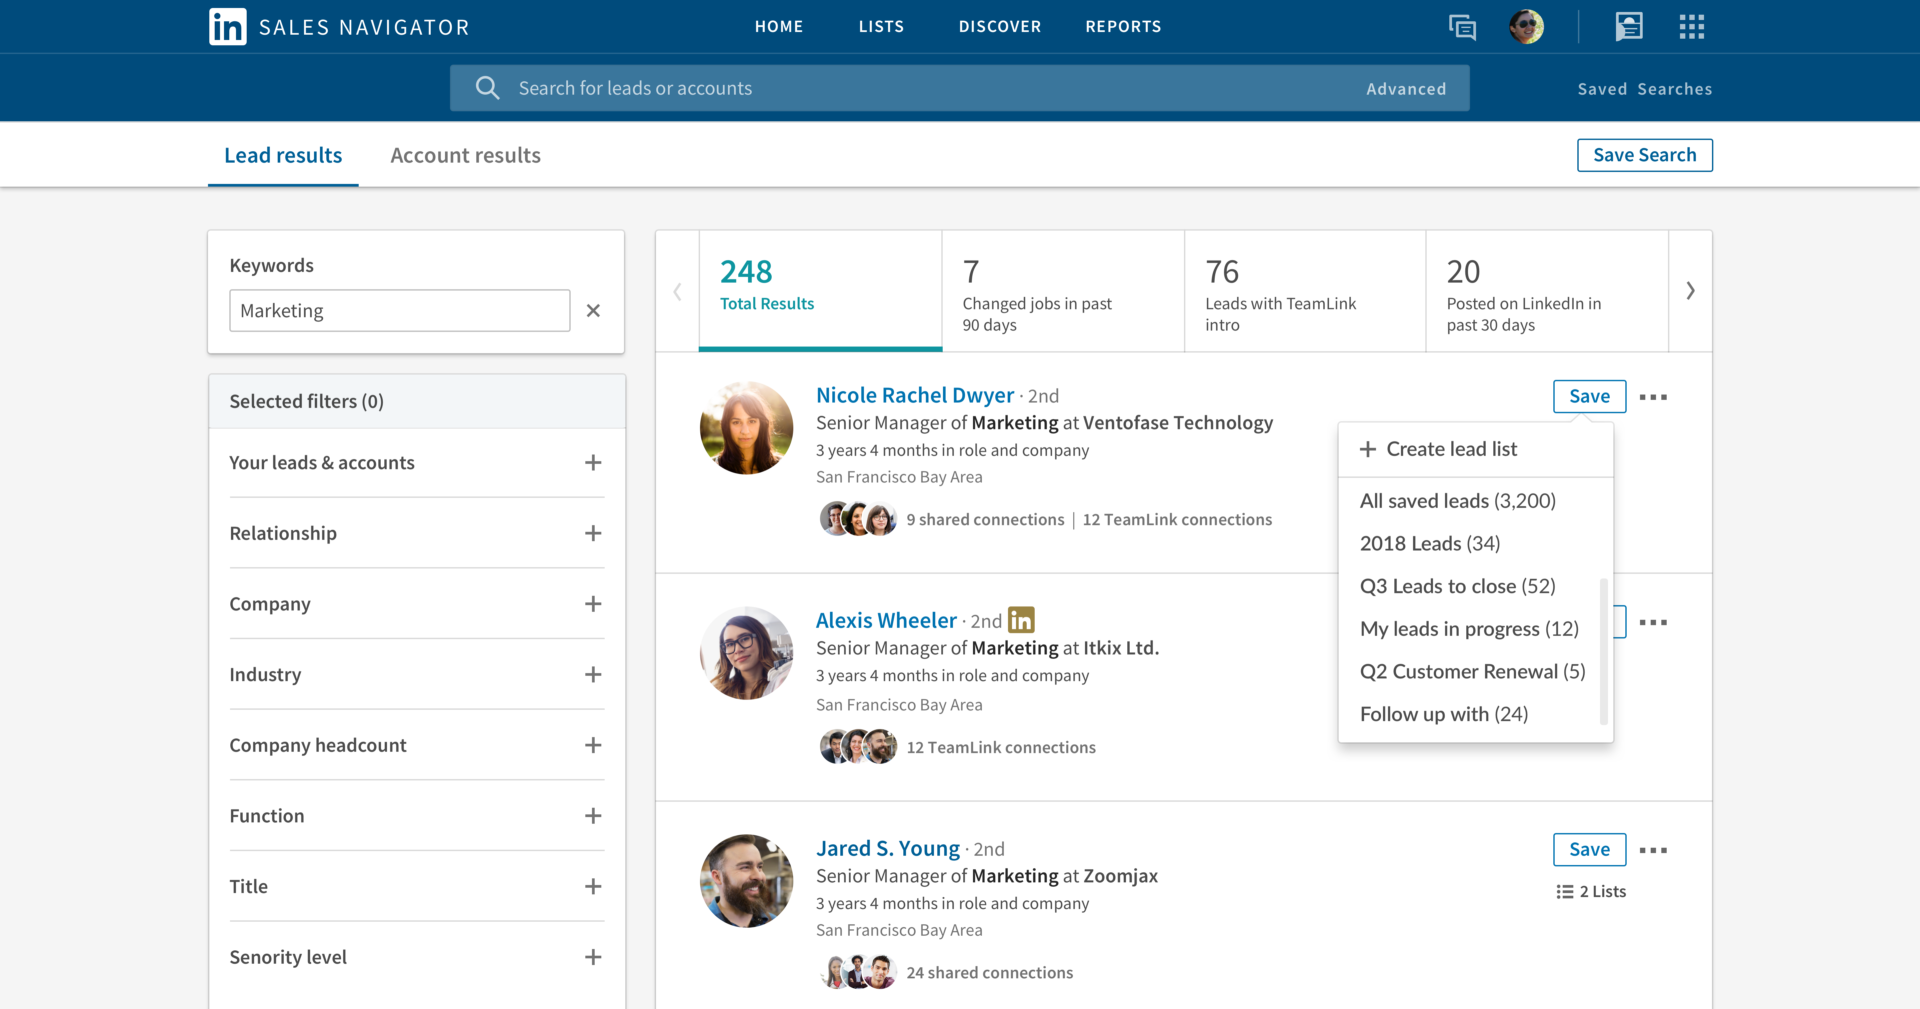
A search using LinkedIn Sales Navigator is much more extensive due to enhanced search features. All of the filters above can be found on a Sales Navigator search as well as the following:
- Industry (more extensive options)
- Function (more extensive options than the services filter)
- Company Head Count
- Revenue
- Company Type
- Seniority Level
- Years in Position/with Company
- Title
- etc.
On the free version of LinkedIn, you can only perform a search for people, but on Sales Navigator, you can also perform a Company Search.
Make Multiple Searches
On Sales Navigator, you have the option to save your searches. You’ll filter your search using a variety of filters and then have the option to save the search. This allows you to go back and reference the people found in your initial search for as long as you choose to keep that search on your account.
As you’re just starting out on Sales Navigator, play around with making multiple versions of your search, perhaps tweaking certain filters on each one. Having multiple searches around a specific type of client for a specific type of business allows you to see which search produces more leads or higher quality leads. After some trial and error you can delete searches that were less successful and continue to look at and edit other searches that produced more leads!
Set a Frequency for New Leads
Once you’ve successfully made a search in Sales Navigator that’s showing you the results you want, you can choose a frequency for how often you’d like Sales Navigator to find you new leads based on your preexisting search. The best frequency to choose would be either weekly or daily, depending on how often you or a member of your team is executing your Lead Gen strategy. There are pros and cons to both frequencies.
- Daily
- Pros: can produce new leads more often, your new daily leads will add up if you don’t check them for a day or some
- Cons: there is no guarantee new leads will be found every day if your search is too niched down
- Weekly
- Pros: this is a great choice if you’re only performing lead generation tasks once a week for your business
- Cons: if you’ve got someone checking for new leads daily, this frequency will only show you results on a weekly basis
Because Sales Navigator Searches tend to produce a lot of results, it may take you a while to sift through the results your initial search provides. Seeing new leads on a daily basis may not be necessary, but it’s great for keeping things fresh and current.
Create Leads Lists for Potential Clients
Finding people in your searches that you think could turn into potential clients? Make your life and pipeline much simpler by creating a leads list for potential clients! Add the people that you are interested in connecting with to a leads list so you can quickly and easily find their profile to eventually start connecting with them! You can create more than one leads list for different businesses, different products or different programs you may be offering through your business!

Utilize the ‘View Similar’ Option in Your Search
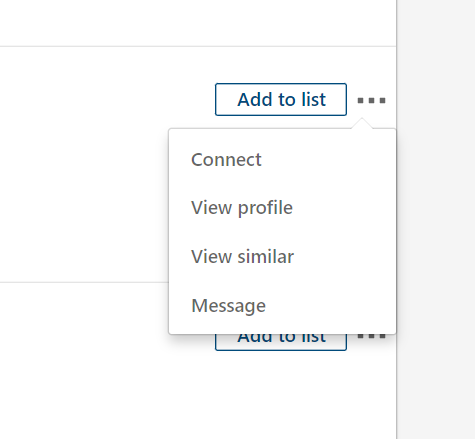
As you’re combing through the results of a search, you may come across a lead that is the ideal potential client! If you want to view people on LinkedIn who may be in similar lines of work, click the 3 dots in the upper right corner of their profile icon and click ‘view similar.’ This will lead you to a whole new list of potential leads that Sales Navigator thinks are similar. This option is not always guaranteed to produce similar leads, but in the case that it does it is a great tool to utilize!
5 Tips for Using LinkedIn Sales Navigator
If you’re ready to make a name for yourself as a thought leader on LinkedIn by logging on, sharing your genius, and just basking in the glow of your newfound visibility- Thought Leaders Collective is the place for you!
You’ll get weekly LinkedIn prompts, access to our supportive Slack community, weekly co-working opportunities and much much more! Check it out and join us inside here!

